ကျွန်တော် UITableView Delete Tutorial မှာ တုန်းက Edit button နှိပ်လိုက်ရင် Delete လုပ်ဖို့အတွက် ပြောင်းသွားပါတယ်။ Edit ပြန်နှိပ်လိုက်ရင် UITableView က Edit ပုံစုံပြောင်းသွားပေမယ့် Edit ကတော့ Done မပြောင်းသွားပါဘူး။ ပြောင်းသွားအောင် နည်းနည်း ပြင်ဖို့လိုပါတယ်။
UITableView Section Tutorial
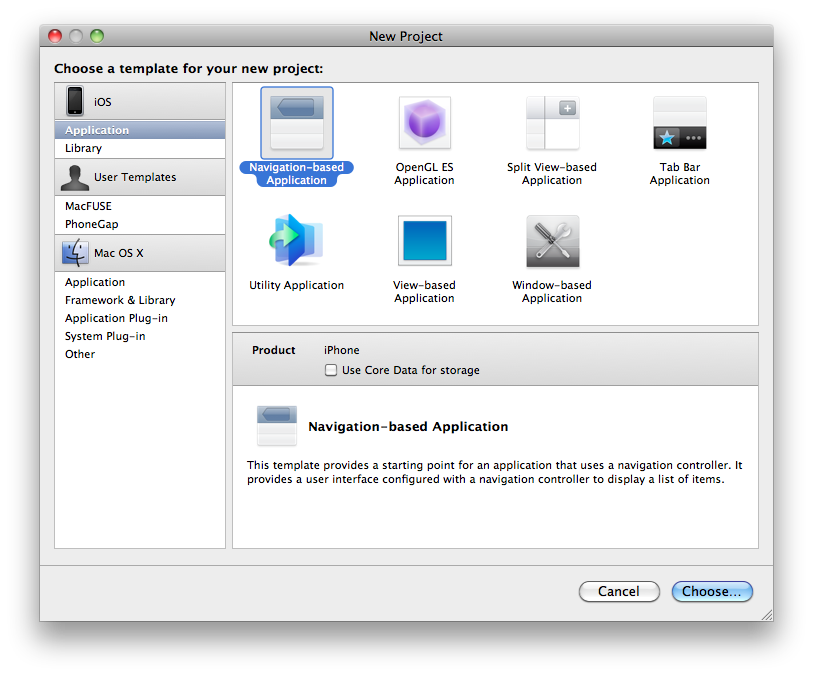
အခု အပိုင်းမှာတော့ UITableView မှာ Section တွေ ခွဲပြီး သုံးတဲ့ အကြောင်းရေးမှာပါ။ အရင်ဆုံး Navigation-base Application ကို ရွေးလိုက်ပါ။
UITableView Add Tutorial
မနေ့က UITableView Delete ကို ပြောပြီးပါပြီ။ အဲဒီ delete မှာပဲ နည်းနည်း ပြန်ပြင်ပါမယ်။
- (void)viewDidLoad {
ရဲ့ အောက်ဆုံးမှာ အောက်ကလို ဖြည့်လိုက်ပါ။ Add button ကို navigation bar ရဲ့ ညာဘက် ထိပ်ဆုံးမှာ ထည့်လိုက်တာပေါ့။
//Crate Add Button
UIBarButtonItem * addButton = [[UIBarButtonItem alloc]
initWithBarButtonSystemItem:UIBarButtonSystemItemAdd
target:self action:@selector(addTable)];
self.navigationItem.rightBarButtonItem=addButton;
UITableView Delete Tutorial
UITableView Tutorial ဆိုပြီးတော့ ကျွန်တော် ရေးပြီးပါပြီ။ ဆက်ပြီးတော့ ထည့်ထားတဲ့ record ကို ပြန်ဖျက်ဖို့ လုပ်ကြည့်ရအောင်။
ပထမဆုံး tableview နဲ့ ချိတ်ဆက်ဖို့အတွက် IBoutlet တစ်ခုကြေငြာဖို့လိုပါတယ်။ အဲဒီတော့ RootViewController.h မှာ ဒီလိုရေးလိုက်ပါတယ်။
#import

@interface RootViewController : UITableViewController {
NSMutableArray *listItem;
IBOutlet UITableView *tableview;
}
@property(nonatomic,retain) NSMutableArray *listItem;
@property(nonatomic,retain) IBOutlet UITableView *tableview;

@end
ပြီးရင်တော့
@synthesize tableview;
ကို RootViewController.m မှာ ဖြည့်ပေးဖို့နဲ့
[tableview release];
ကို dealloc မှာ ထည့်ပေးဖို့ မမေ့ဖို့လိုပါသေးတယ်။
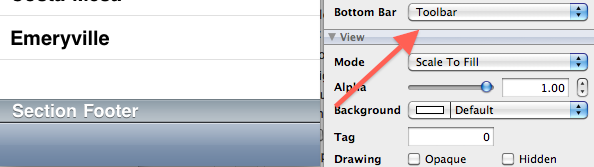
RootViewController.xib ကို ဖွင့်ကြည့်လိုက်ပါ။ Bottom Bar မှာ Toolbar ရွေးလိုက်ပါ။ UITableView မှာ Toolbar ပေါ်လာပါလိမ့်မယ်။
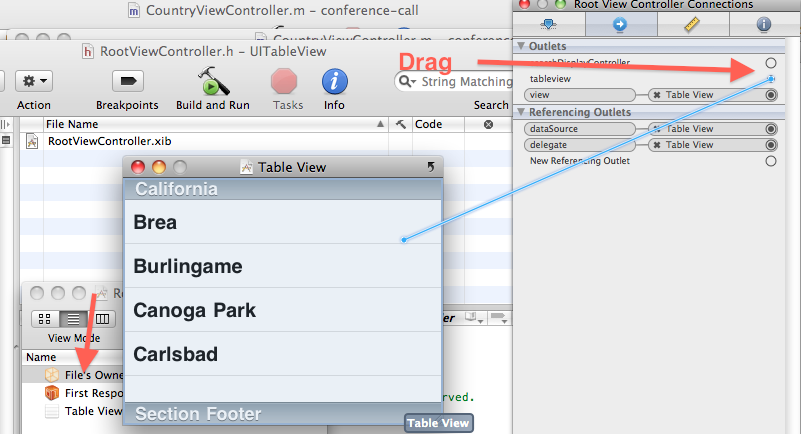
အဲလို ပြောင်းပြီးရင် IBoutlet ချိတ်ဖို့အတွက် File’s Owner ကို click လုပ်ပါ။ ပြီးရင် ဒုတိယ tab ဖြစ်တဲ့ Connections Inspector ကို သွားပါ။ အဲဒီမှာ tableview ဆိုပြီး ပေါ်နေပါလိမ့်မယ်။ အဲဒီ tableview က ညာဘက် စက်ဝိုင်းလေးကို drag ဆွဲပြီး uitableview နဲ့ ချိတ်ပေးလိုက်ပါ။
ပြီးရင်တော့ coding ကို ပြန်သွားပါမယ်။
Continue reading “UITableView Delete Tutorial”